The following location information must be provided: •Provide a short description of the location e.g. the address or distance from notable landmarks. The description provided may need to be used to verify the marked map excavation(s). •Add the road segment number(s) for where works will be carried out. •Use the map to pinpoint the location of each excavation. |
1.Click the 2.Select the drawing tool. For a trench, use the line tool. For general excavations, use the marker tool. 3.Move the drawing tool across the map area and click on the map when you are at the location of the excavation. Note: Once details have added and saved, you can move the marker or redraw the trench. |
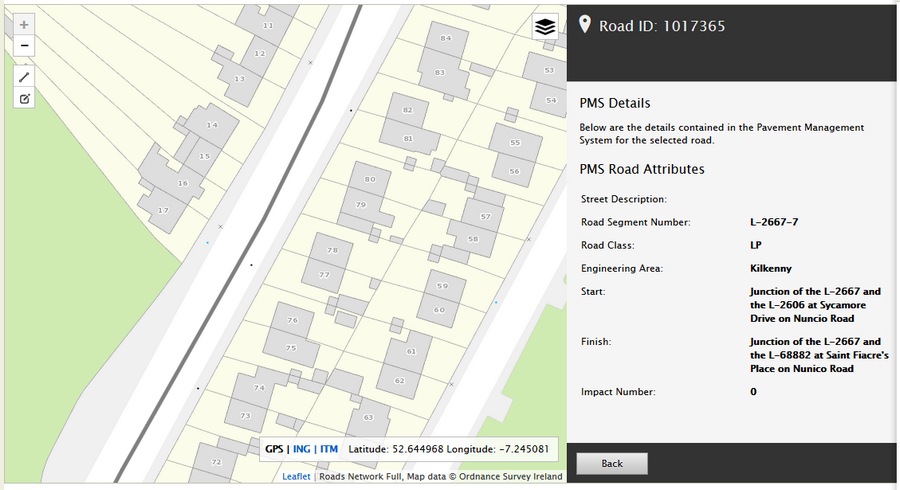
Excavations are broken up into segments. A segment represents an area of the excavation that is taking place on a particular surface type and material type. Example: An ‘Transverse Trench’ excavation could start in the Verge, travel across the Footway and end in the Roadway. This excavation therefore would consist of 3 segments, one for each of the surface types affected by the excavation. Traffic Impact / Street TypeTraffic impact number of the roadway where the works will be carried out must be provided. How to find the traffic impact number: The traffic impact number can be found by clicking the black lines on the map.
In some cases, the Licensing Authority may not have set a Traffic Impact number for the road segment you plan to work on. In which case the ‘Road with Traffic Impact 0’ should be selected for the Street Type. To set the traffic impact, select the Street Type that refers to the corresponding traffic impact number. 
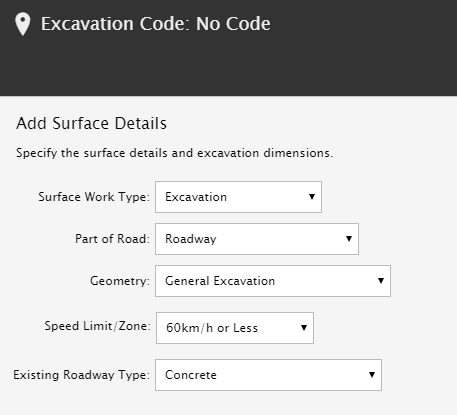
During the processing stage, the Licensing Authority may request the Traffic Impact to be changed/corrected. Excavation DetailsThe applicant is required to provide excavation dimensions, surface and material details for each excavation segment.
|
As a alternative to the map view, the excavation details can now be viewed using the new "List View" mode. The list will include the following details with a link to open the excavation on the map. 1.Excavation Code: Unique code for the excavation. This is visible when hovering over a marker on the map. 2.Coordinates (GPS): Depending on the excavation type, this will display either "Point" or "Polyline" followed by the coordinates. The excavation can be opened and viewed on the map be clicking anywhere on the excavation row. 3.Street Type: For now, the street type will be based on the traffic impact number. (In a future release, with full PMS integration, this will show the road number and/or street name). 4.No. of Surfaces: Indicates the number of surfaces added to the excavation. 5.Highest Traffic Impact: When there are multiple surfaces added to an excavation this will show the number of the surface with the highest traffic impact. 6.Excavation Area (m2): This is calculated as the Length x Width of the excavation. 7.Status: This will show the reinstatement status (i.e complete or incomplete). Using the list view, you can also quickly see the total number of excavations added to the application. |